[HOW TO] Enable USB Debugging Mode on Android
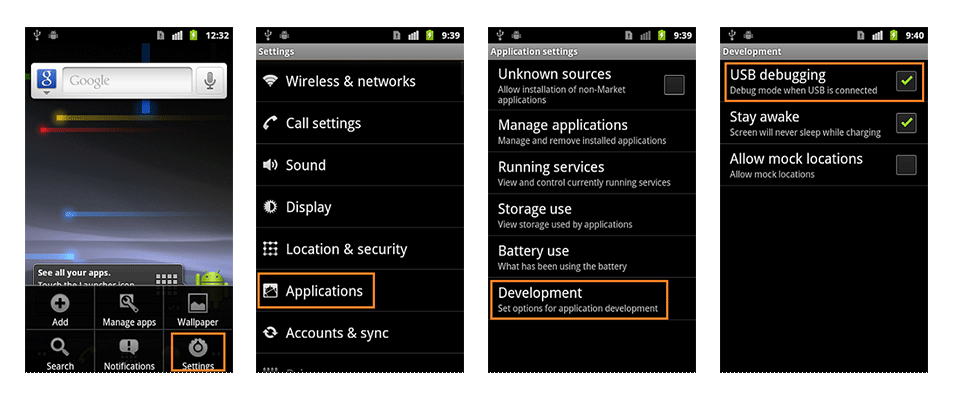
1. Android 2.0-2.3.x
Settings > Applications > Development > USB Debugging.
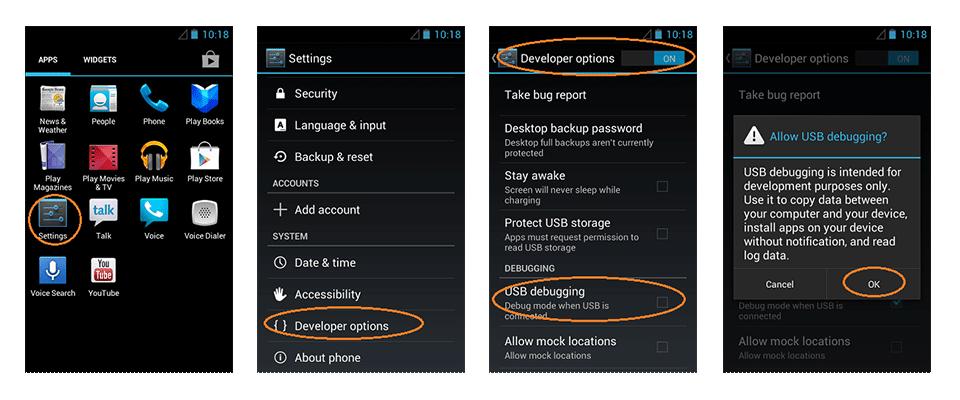
2. Android 3.0- 4.1.x
Settings > Developer Options > USB Debugging.
3. Android 4.2.x and higher.
In Android 4.2 and higher versions, the Developer Options menu and USB Debugging option have been hidden. In former 4.X versions of Android, USB Debugging option is under Developer Options menu.
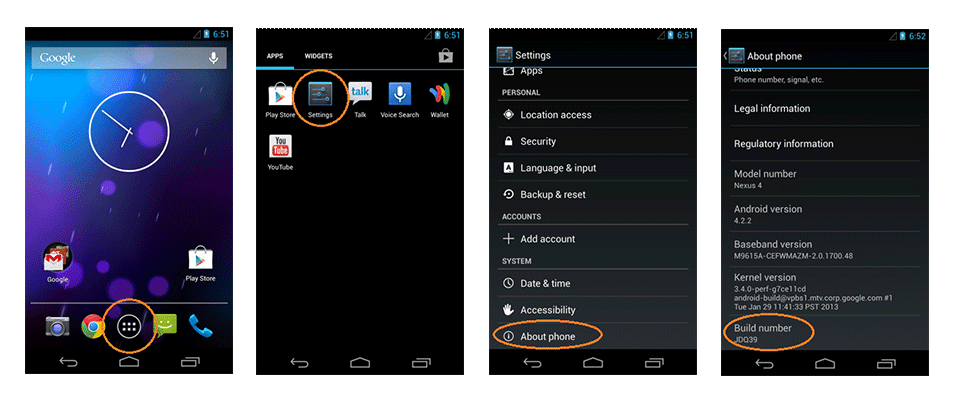
- Click Menu button to enter into App drawer.
- Go to "Settings".
- Scroll down to the bottom and tap "About phone" or "About tablet",
- Scroll down to the bottom of the "About phone" and locate the "Build Number" field.
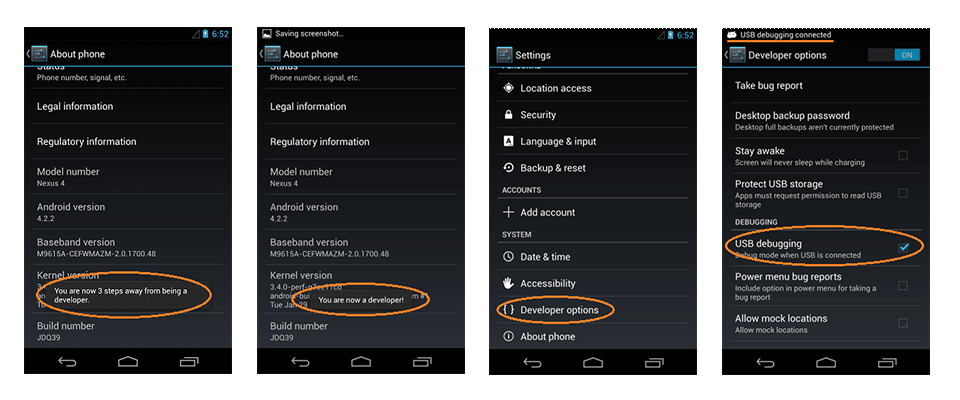
- Tap the Build number field seven times to enable Developer Options. Tap a few times and you'll see a countdown that reads "You are now 3 steps away from being a developer."
- When you are done, you'll see the message "You are now a developer!".
- Tap the Back button and you'll see the Developer options menu under System on your Settings screen.
- Go to Settings>Developer Options>USB Debugging. Tap the USB Debugging checkbox.
First, you need to enable "Developer Options Menu".
Now, you can enable USB Debugging mode.
4. Android 5.0 Lollipop
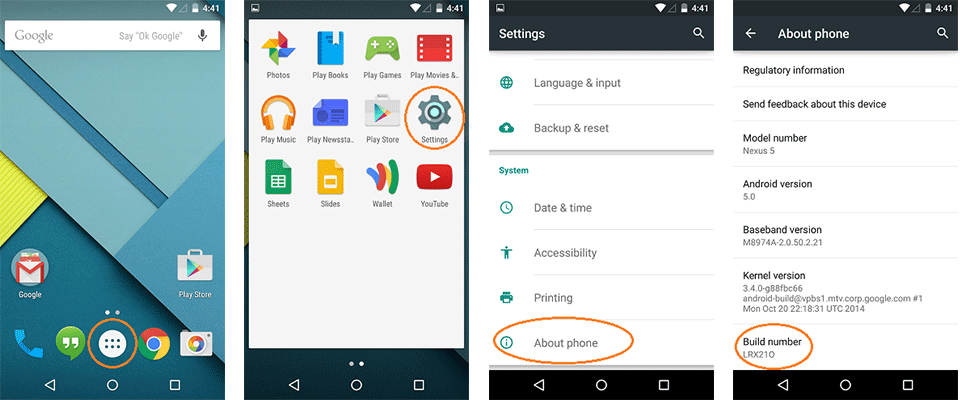
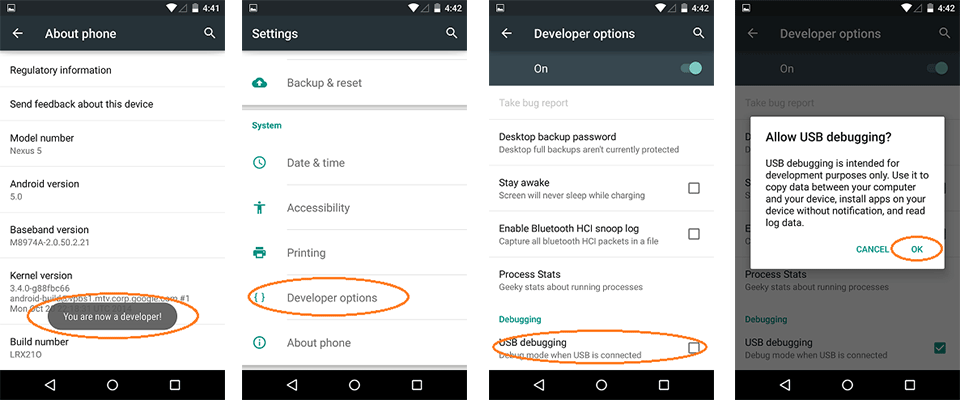
To enable USB Debugging on Android 5.0 Lollipop is the same as Android 4.2.x.
- Settings > About Phone > Build number > Tap it 7 times to become developer;
- Settings > Developer Options > USB Debugging.
Warning
USB Debugging should only be enabled when you need it. Leaving it enabled all the time is kind of a security risk for that this mode grants you high-level access to your device. Say if you connect your Android phone to a USB charging port in a public location, the port could use the USB access to your phone to access data on your phone or install malware. This could happen when and only when USB debugging mode is enabled.
To disable USB Debugging and other developer options when you don't need them, slide the switch at the top of the screen to OFF.


.jpg)


